API 보안
토큰은 HTTP API와 MQTT 클라이언트 인증에 사용됩니다. 생성된 키(X.509)는 MQTT TLS 연결과 gRPC 연결에 사용됩니다.
키 & 토큰 생성
웹 UI
좌측 메뉴에서
 아이콘을 선택합니다.
상단 좌측 영역의
+아이콘 을 클릭합니다.
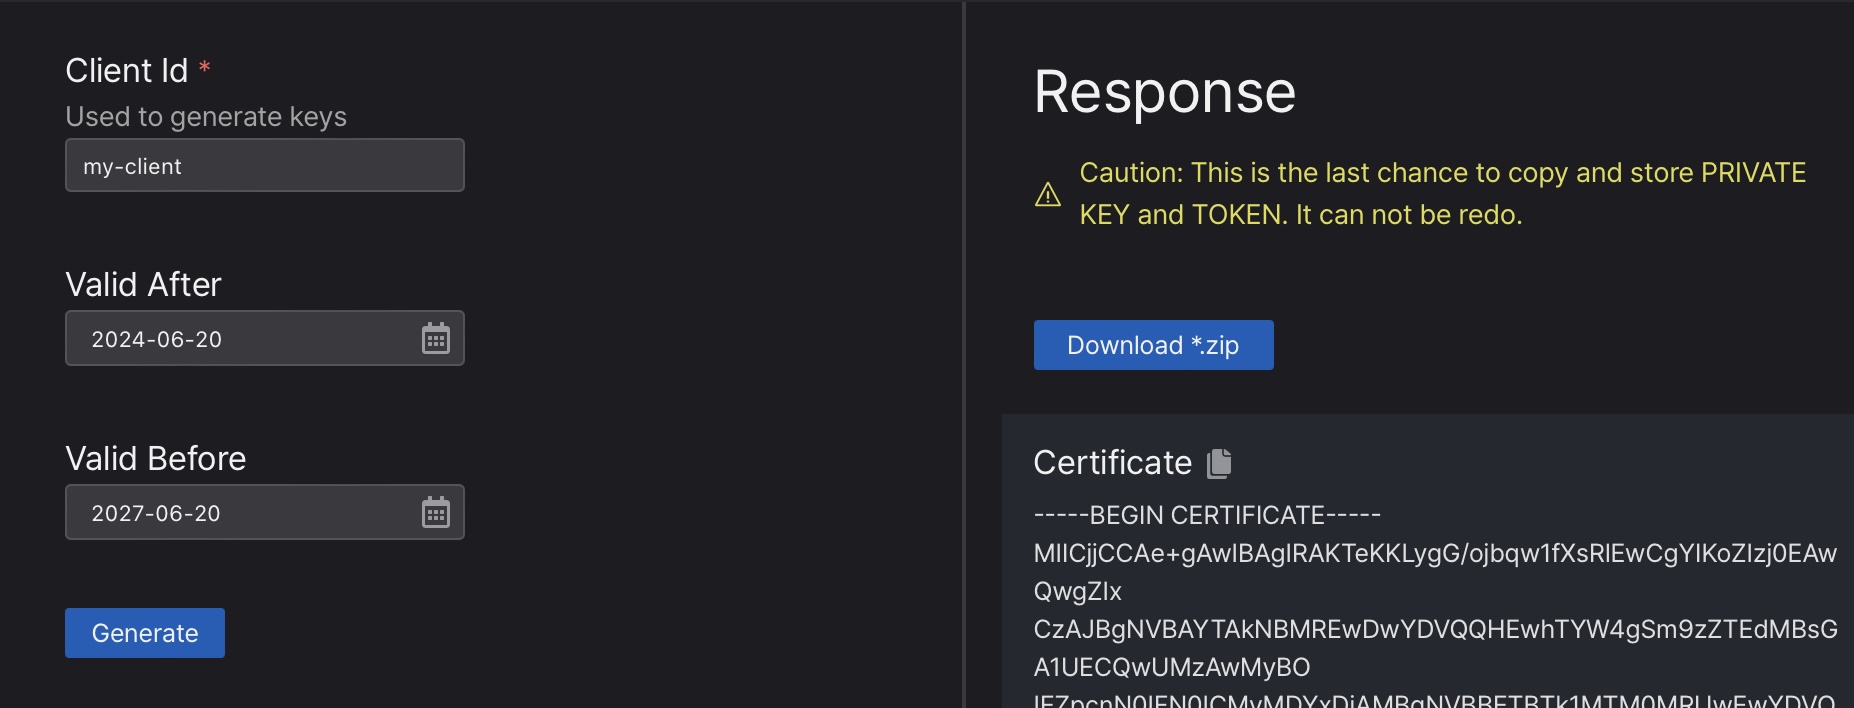
고유한 “Client Id”를 입력하고 유효 기간을 설정합니다(기본값은 오늘 기준 3년).
“Generate” 버튼을 누르면 해당 클라이언트용 키 파일이 생성됩니다.

- “Download *.zip” 버튼을 클릭하거나 각 파일 내용을 복사해 저장합니다.
키는 다시 생성할 수 없으므로 이 단계가 유일한 백업 기회입니다.
셸 명령
machbase-neo shell key 서브커맨드를 통해 클라이언트 키와 토큰을 관리할 수 있습니다.
등록된 인증 키와 토큰 조회
machbase-neo shell key list등록된 client-id와 유효 기간이 표시됩니다.
$ machbase-neo shell key list
┌────────┬──────────────────────┬───────────────────────────────┬───────────────────────────────┐
│ ROWNUM │ ID                   │ VALID FROM                    │ EXPIRE                        │
├────────┼──────────────────────┼───────────────────────────────┼───────────────────────────────┤
│      1 │ myid2                │ 2023-02-05 01:55:18 +0000 UTC │ 2033-02-02 01:55:18 +0000 UTC │
│      2 │ myid3                │ 2023-02-05 01:56:36 +0000 UTC │ 2033-02-02 01:56:36 +0000 UTC │
......
기존 키/토큰 삭제
machbase-neo shell key del <client-id>$ machbase-neo shell key del myid2
deleted새 키/토큰 등록
machbase-neo shell key gen 서브커맨드는 지정한 client-id에 대해 새로운 키와 토큰을 생성합니다.--output 옵션으로 저장 경로를 지정하면 해당 경로 아래에 키와 토큰이 생성됩니다.
machbase-neo shell key gen <client-id> --output <output_file>예를 들어 client-id myapp01에 대한 새로운 키를 생성하면 *_cert.pem, *_key.pem, *_token 파일이 생성됩니다.
$ machbase-neo shell key gen myapp01 --output ./myapp01
Save certificate ./myapp01_cert.pem
Save private key ./myapp01_key.pem
Save token ./myapp01_token
생성된 파일을 확인합니다.
$ ls -al ./mayapp01*
-rw-r--r--  1 eirny  staff  782 Feb 20 19:33 ./mayapp01_cert.pem
-rw-------  1 eirny  staff  390 Feb 20 19:33 ./mayapp01_key.pem
-rw------- 1 eirny staff 81 Feb 20 19:33 ./mayapp01_token*_cert.pem: 서버가 서명한 클라이언트용 X.509 인증서*_key.pem: 클라이언트의 개인 키*_token: 클라이언트 토큰 문자열
토큰 기반 인증 시 *_token 파일의 내용을 사용합니다.
$ cat ./myapp01_token
myapp01:b:d59310703c1ebf627f8b781fb50437326ec65b067257ebc72f07b12846761d17
서버 인증서
서버 인증서를 내려받으려면 machbase-neo shell key server-cert --output <경로> 명령을 사용합니다.
machbase-neo shell key server-cert --output ./machbase-neo.crtHTTP 토큰 인증
machbase-neo HTTP API는 토큰 기반 인증을 지원합니다.
명령줄 옵션 --http-enable-token-auth true 또는 설정 파일에서 EnableTokenAuth = true로 설정하면, 모든 HTTP API 호출 시 사전에 등록된 토큰을 Authorization 헤더로 전송해야 합니다.
machbase-neo serve --http-enable-token-auth true서버 시작 로그에서 HTTP 토큰 인증이 활성화되었음을 확인할 수 있습니다.
......
2023/02/20 20:14:29.878 INFO  neo neosvr           HTTP token authentication enabled
2023/02/20 20:14:29.878 INFO  neo neosvr           HTTP Listen tcp://127.0.0.1:5654
......
토큰 사용 HTTP 클라이언트
토큰 파일 내용을 Authorization: Bearer <token> 헤더에 설정해 API를 호출합니다.
curl --output - http://127.0.0.1:5654/db/query \
    --data-urlencode "q=select * from EXAMPLE limit 2" \
    -H "Authorization: Bearer `cat ./http-api-app01_token`"
{
"data": {
"columns": [ "NAME", "TIME", "VALUE" ],
"types": [ "string", "datetime", "double" ],
"rows": [
[ "wave.sin", 1675851592000000000, 0 ],
[ "wave.cos", 1675851592000000000, 1 ]
]
},
"success": true,
"reason": "success",
"elapse": "1.866708ms"
}Authorization 헤더를 생략하거나 잘못된 토큰을 사용하면 다음과 같이 거부됩니다.
curl --output - http://127.0.0.1:5654/db/query \
    --data-urlencode "q=select * from EXAMPLE limit 2" \
    -H "Authorization: Bearer http-api-app01:b:intended-wrong-value"
올바르지 않은 토큰일 경우 HTTP/1.1 401 Unauthorized와 함께 다음과 같은 에러 메시지가 반환됩니다.
{"success":false,"reason":"invalid token"}MQTT 토큰 인증
machbase-neo의 MQTT API 역시 토큰 기반 인증을 지원합니다.
명령줄에서 --mqtt-enable-token-auth true 옵션을 사용하거나 설정 파일에서 EnableTokenAuth = true로 지정하면, MQTT CONNECT 메시지에 사전에 등록한 client-id와 토큰(사용자명)을 포함해야 합니다.
machbase-neo serve --mqtt-enable-token-auth true서버 로그에서 MQTT 토큰 인증이 활성화되었음을 확인할 수 있습니다.
......
2023/02/21 13:43:11.178 INFO  neosvr           MQTT token authentication enabled
2023/02/21 13:43:11.180 INFO  mqtt-tcp         MQTT Listen tcp://127.0.0.1:5653
......
토큰 사용 MQTT 클라이언트
CONNECT 메시지의 username에 등록된 토큰을 사용하고 password는 비워 둡니다.
mosquitto_pub -h 127.0.0.1 -p 5653 \
    --username `cat ./mqtt-api-app01_token` \
    -t db/write/EXAMPLE            \
    -m '[ "wave.pi", `date +%s000000000`, 3.1415]'
올바른 토큰을 제공하지 않으면 서버가 CONNECT 메시지를 거부합니다.
mosquitto_pub -h 127.0.0.1 -p 5653 -t db/write/EXAMPLE \
    -m '[ "wave.pi", `date +%s000000000`, 3.1415]'

Connection error: Connection Refused: not authorized.
Error: The connection was refused.
MQTT X.509 인증
machbase-neo는 --mqtt-enable-tls true 명령줄 옵션 또는 설정 파일에서 Tls.Enabled = true로 시작하면,
클라이언트로부터 TLS(일명 SSL) 연결을 수신합니다.
TLS가 활성화되면 토큰 기반 인증은 무시되며, 사전에 등록된 X.509 인증서로 SSL 핸드셰이크를 성공적으로 완료한 연결만 허용합니다.
username과 password 필드를 무시합니다.
해당 값들을 지정하지 마십시오. 하지만 명확성을 위해 client-id는 여전히 설정해야 합니다.X.509 사용 MQTT 클라이언트
클라이언트는 위 섹션에서 생성한 사전 등록된 client-id와 키, 인증서를 사용해야 합니다.
CONNECT 메시지의 client-id에는 등록된 client-id를 적용하고, username과 password는 설정하지 마십시오.
mosquitto_pub -h 127.0.0.1 -p 5653 \
    --id myapp01            \
    --cert ./myapp01_cert.pem \
    --key ./myapp01_key.pem   \
    --cafile ./machbase-neo.crt --insecure \
    -t db/append/EXAMPLE            \
-m '[ "wave.pi", `date +%s000000000`, 3.1415]'--id키 생성 시 사용한client-id를 지정합니다--cert*_cert.pem으로 생성된 클라이언트 인증서 파일입니다--key*_key.pem으로 생성된 클라이언트 키 파일입니다--cafile클라이언트 인증서가 서버에 의해 서명되었으므로 서버 인증서를 지정합니다. 이 파일을 얻는 방법은 아래를 참조하세요.--insecure서버 인증서가 자체 서명되었기 때문에 추가로 필요합니다.